


")


In this tutorial I hope to help you discover the light you need in order to achieve a black background in-camera. Many, many times I use this type of light and I’m excited to share this little tip with you!
What you’re looking for is called light fall off. The somewhat technical way of explaining it is this: You’re looking for light that has a 2-3 stop difference in the light that your subject is in. Meaning, let’s say my subject is metering *here* in the light that I’m shooting in; however, if I pull the subject back into the darker area? I’m going to have to make some adjustments in my settings in order to meter properly for that light. Usually, that means about a 3 stop difference in the light.
As an example, I recently used our three year old English Lab, Max, in this type of light.
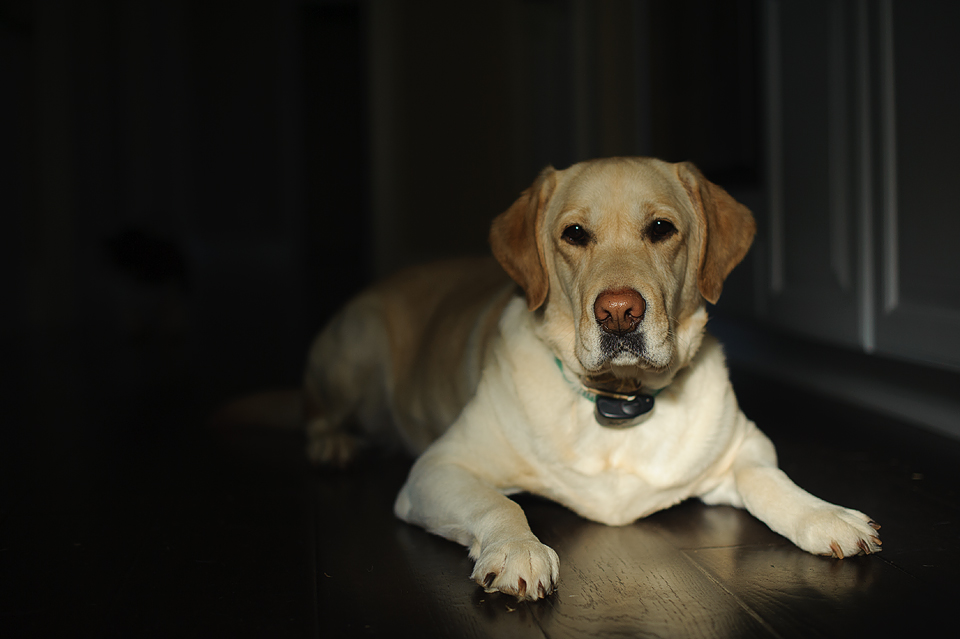
Above is the SOOC (straight out of camera…no edits made) file of Max sitting in a little patch of light.
The settings for this image were:
ISO 400, f 2.2 shutter speed 1250
I used a 50mm 1.4 lens
I spot metered for the brightest area of his fur on his chest
Kelvin white balance of 4750
When I meter for that brighest part of him, I’m throwing the rest of the area behind him into shadow. See that? Sometimes, I have to increase those blacks in the background in order to make it ‘smooth’ so to speak. In this shot, I see a bit of the white trim of the kitchen wall coming in behind him. I’ll edit that in a bit, but I’m pretty happy with this SOOC image of him.
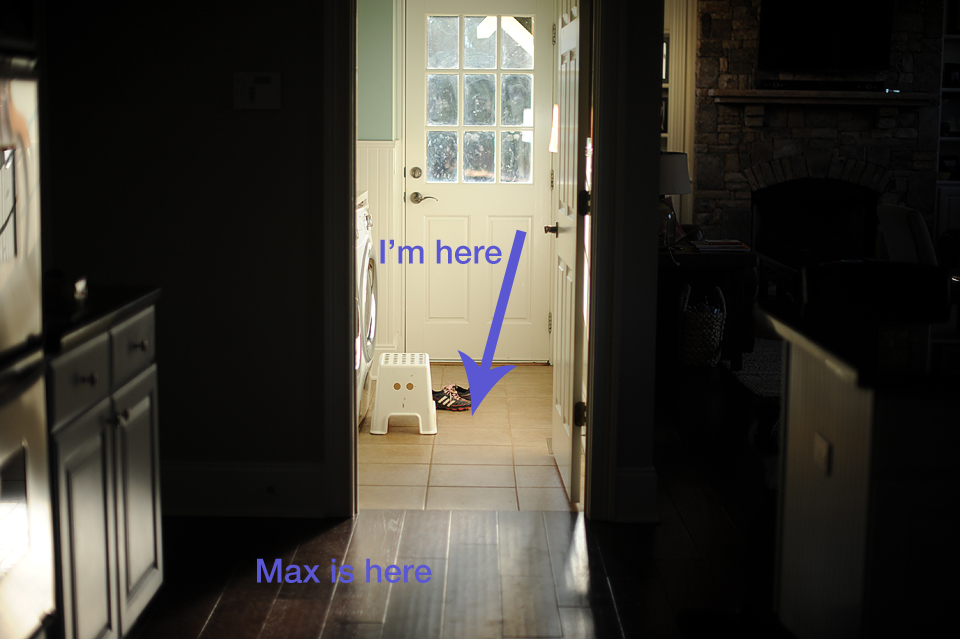
I know pullbacks are always helpful, so here’s a few for you. Beware, you’re about to see my dirty floor. If I can add a disclaimer? The dog sheds his light hair on our dark floor, BUT he’s worth it.
Walking in from outside, I noticed the light on the floor. (That’s another thing…always look down!)
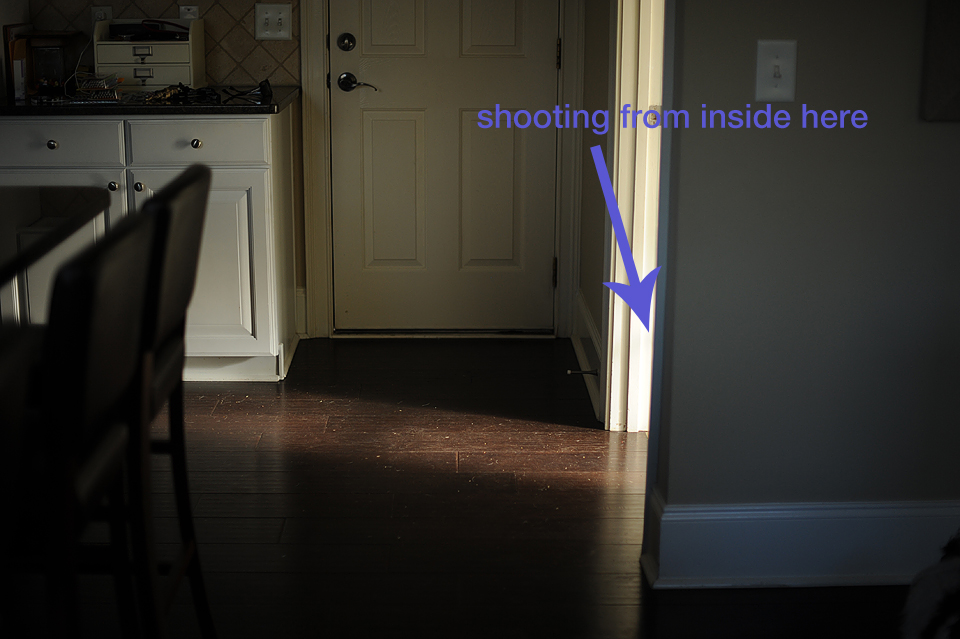
I grabbed some treats, called Max over and I laid down on my tummy inside the laundry room so that I could shoot him straight on. Behind him is the light fall off.
This is what it looked like from where I was lying down. Oooooohhh…look at that janky floor!

Notice the light he’s in compared to the light that’s just behind him? That is pretty extreme, don’t you think? Metering for the subject that’s in that light will throw the background into darkness. It’s great for hiding messy backgrounds and giving your image a clean finish.
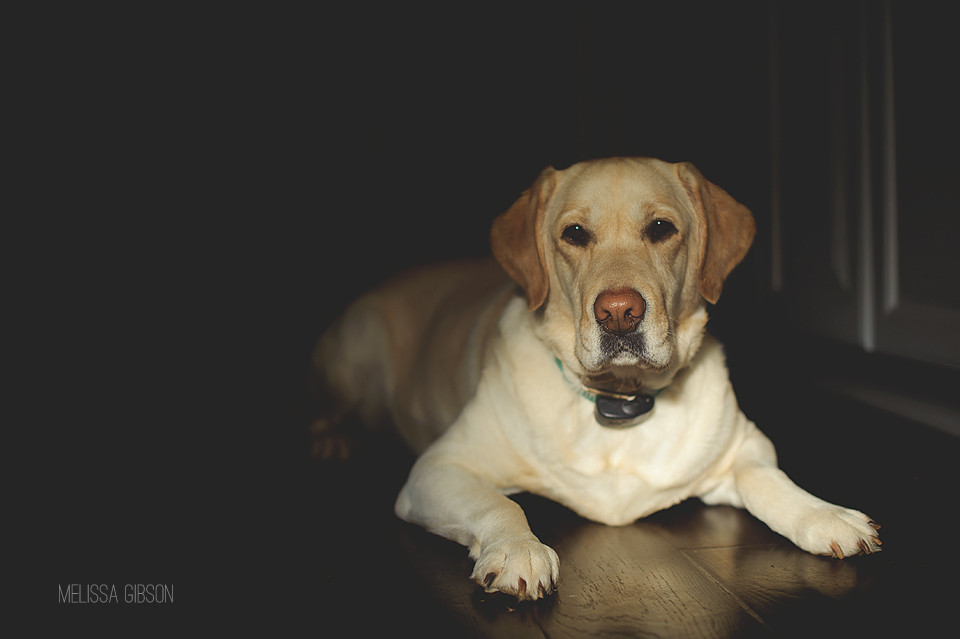
Here’s the before, SOOC shot again.
And here’s my final edit. All I did here was pull the blacks just a smidge on the background ONLY. Sometimes I don’t even have to do that. I finished with an action from Marissa Gifford Photography.
Any questions? Please don’t be too shy to ask. Just post in the comments and I’ll help out. I pinky promise that there are NO dumb questions.
Also, if you’re interested in Marissa’s actions, you can find them here: Marissa Gifford Photography


Thanks for sharing this! Can’t wait to play and give it a try.
Woo hoo! Love it! Share more!
Thank you for sharing this! How did you darken just the background, did you select only Max then inverse the selection? How did you keep the light fall-off looking natural while making the adjustments? I find that I always have obvious edges when I select someone/something and darken just the background!
Hi Amelia! I work in PSE and I darkened the background by doing a levels adjustment layer then brushing off of Max with a soft black brush. The majority of the time, I’m using a soft brush to remove the change from the subject. I hope this answers the question. 🙂
Yes! Thank you!
Wow, I love this image, and have been wondering about this lately. I have many of your actions and love them! Do you mind sharing which one you used?
Hi! I loooove Marissa’s actions! The one I used here is called Lifestyle Color. 🙂
Thank you! SO looking forward to trying this out.
Total rookie question…what’s PSE? Photoshop something??
Hi!! Yep, you got it! PSE is Photoshop Elements.
This is so helpful! Thanks especially for the pullbacks. I need to break out the treats and shoot my dog more often! 🙂
Hello there, thanks for sharing this tips and how you achieved the look. Can’t wait to try this myself. Can I ask how you determined the Kelvin White balance? 🙂
Hi Andrea! For the kelvin temperature, I start with 5000 when I’m indoors with natural window light; however since this light was a bit warm to begin with (late afternoon sun), I chose to go a bit lower in order to keep that warmth at bay. 🙂 Hope that helps out!
Thanks a million for this tutorial! I love this look and have been driving myself nuts trying to figure it out!
I love the way you explained it!